Installation Checklist
The GNSS Compass is designed to be plug and play such that it does not normally require any customer configuration. Typical installations utilising NMEA 0183 or NMEA 2000 will work out of the box.
Connection Options
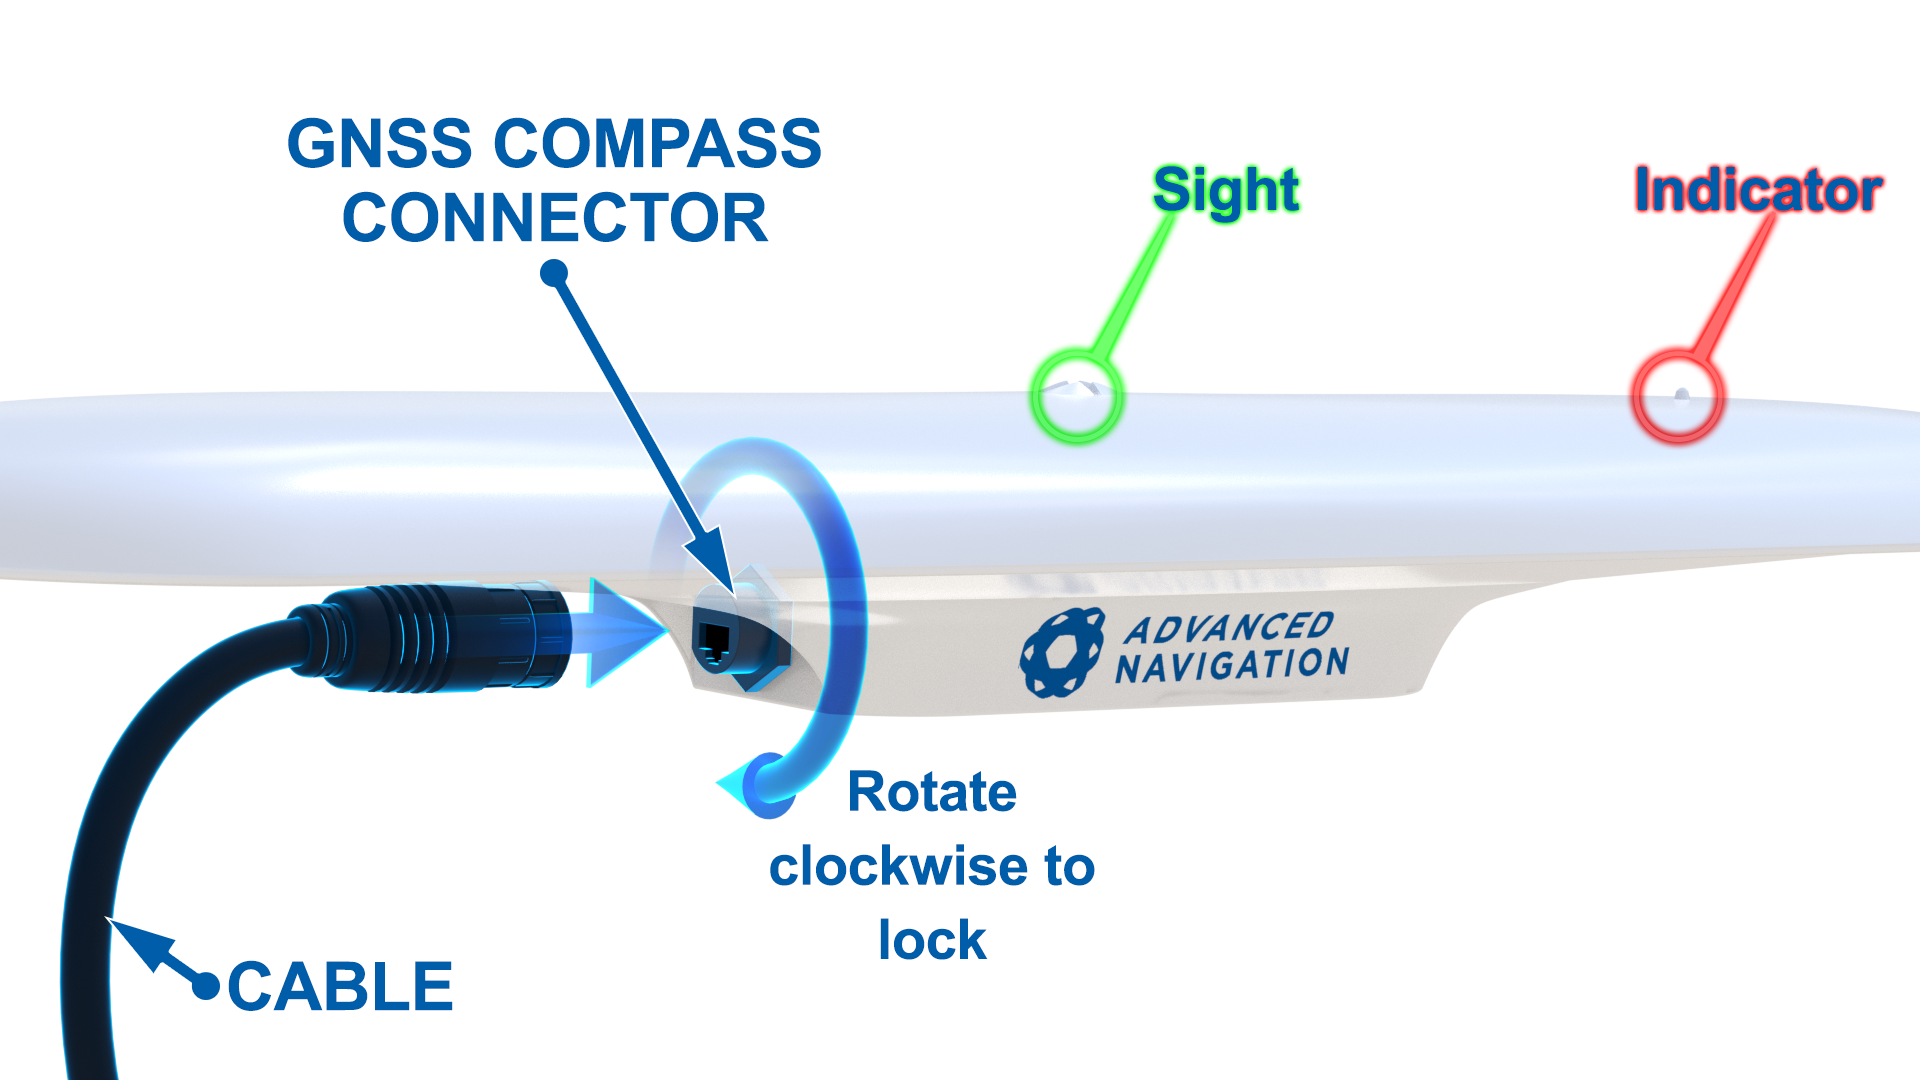
The cables available from Advanced Navigation feature a connector with a locking nut and o-ring that are waterproof and dirtproof to the IP67 standard as well as resistant to shock and vibration. The environmental protection only applies when the connector is locked by pushing in and rotating the nut clockwise until it clicks, see Connector locking.
NMEA 2000
For connection to an NMEA 2000 network the NMEA 2000 Drop Cable is required (part number GC-NMEA2000-CABLE). One end of the cable should be connected to the GNSS Compass and the other end to a T-connector on the NMEA 2000 backbone of the vessel.
NMEA 0183
For connection to an NMEA 0183 network the Advanced Navigation Serial Breakout Cable is required (part number GC-SER-BREAK-20M). The auxiliary serial port connector should be connected to the receiving device. Power supply of between 9 to 36 volts should be applied to the DC jack with a 5 amp fuse.
Ethernet
For connection to an Ethernet network the Advanced Navigation Ethernet Connection is required (part number GC-POE-CABLE-20M). One end of the cable should be connected to the GNSS Compass and the other to either a PoE injector (part number POE-INJECTOR-DC) or 802.3af or 802.3at compliant PoE switch. The PoE injector or switch is then connected to a router.
ANPP
For connection to an ANPP receiving device the Advanced Navigation Serial Breakout Cable is required (part number GC-SER-BREAK-20M). The primary serial port connector should be connected to the receiving device. Power supply of between 9 to 36 volts should be applied to the DC jack with a 5 amp fuse.
For advanced applications requiring configuration changes please follow the steps below.
Configuration
Serial Variants
-
Mount the unit in the standard alignment of X+ pointing forward and Z+ pointing down. For more information, see Mounting GNSS Compass.
-
Connect a USB to serial adaptor to the primary port of the GNSS Compass Serial Breakout Cable.
- Java 11 is required to run GNSS Compass Manager.
Adoptium JRE 11 is the recommended Java installer to be used on all platforms. Install the latest version of Java 11 from Adoptium, selecting the correct operating system and architecture for your computer. -
Download GNSS Compass Manager from the GNSS Compass product page of the Advanced Navigation website.
Note: INS Manager is only available for systems with x64 architecture.
-
Double click INS Manager to start the application. See Using GNSS Compass Manager for specific notes for different platforms
-
Run INS Manager by double clicking on the file.
-
Select the port, set the baud rate to 115,200 and click Connect.
-
Using the Configuration menu, options can be changed as required. Changes to configuration are saved between power cycles and only need to be applied once.
Ethernet Variants
-
Mount the unit in the standard alignment of X+ pointing forward and Z+ pointing down. For more information, see Mounting GNSS Compass.
-
Plug the Ethernet cable from the GNSS Compass into the “Data+Power” port on the PoE injector. Plug an Ethernet cable into the Data port and connect the other end to a DHCP router.
-
Download and install the Bonjour ZeroConf networking utility from the link https://www.advancednavigation.com/Bonjour64.msi.
-
Open a web browser and type in the address http://gnss-compass.local/ to access the web interface.
-
Using the Configuration menu, options can be changed as required. Changes to configuration are saved between power cycles and only need to be applied once. The default username is admin and default password is password.