Mapping Enhancements
Mapping enhancements are overlay files that contain additional data to supplement and enrich the existing Subsonus mapping system. Mission enhancements are appended to missions as individual layers that can be shown or hidden. Mapping layers are essentially spatial datasets that can include information such as contours, underwater infrastructure, and known obstructions.
Adding a mapping layer with to a mission plan can help you and optimise mission task survey paths by taking the most direct transit path between known points of interest and by pro-actively avoiding known underwater features or obstructions.
Mapping layers makes it possible to leverage previously acquired data by importing spatial datasets from multiple sources into the same mission plan. For example, data from a prior reconnaissance mission conducted with Hydrus could be combined with a dataset obtained from a side scan sonar survey. This data integration functionality facilitates efficient planning for subsequent missions, allowing targeted exploration of specific areas of interest with ease, thus maximising the value of existing data.
The following industry standard GIS data formats are suppoerted for custom mapping layers:
-
GeoJSON (used for defining georeferenced waypoints, lines, polygons and simple geometries)
-
KML/KMZ (standard GIS format for spatial information and metadata)
-
ESRI shape world files for non-topological geometry vectors: .wld, .pgw, .pngw, .jgw, .jpgw, .bgw, .bmpw
-
Supported image file types associated with world files: .jpg, .png, .bmp
-
Note: If required and to enable data interoperability, various third-party software tools are available for converting proprietary file formats to the above-mentioned, supported interchangeable formats.
All mapping enhancements functionalities are available via the Mapping Layers button in the Main view.
Mapping Layers
The default mapping layers are shown at the top of the Mapping Layers pane:
-
Water - Water surface animation layer (for visualisation purposes).
-
Satellite - Satellite image layer. Enabling this layer can be useful for identifying and using geographical references and landmarks.
-
Seafloor - This mapping layer visualises the seafloor as per the Seafloor Depth settings found in the Map Options dialog.
User configurable, custom mapping layers are shown underneath the default mapping layers. To add custom mapping layers, see Map Options.
Click the Mapping Layers button in the Main view to access the Mapping Layers pane.
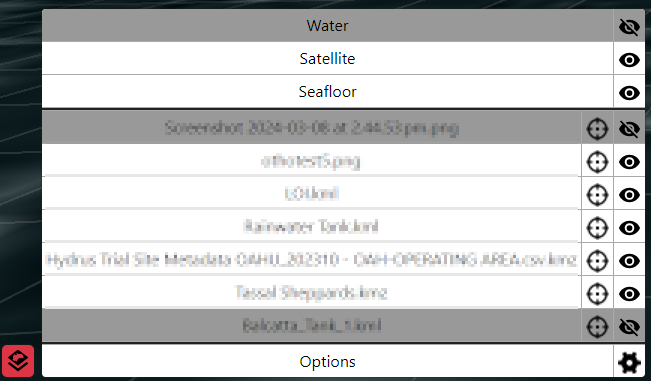
Mapping Layers Pane
Map Options
The following procedure outlines how to customise the map options, including how to upload custom mapping layer files to your mission or a recorded session:
-
Ensure your Mapping Enhancement files are prepared and saved in a supported format. Take note of the file's location on your computer for easy access during the upload process.
-
Click on the Mapping Layers button. Then click Options.
Mapping Layers Pane
-
Set the General tab settings as per your preference:
-
Show Radar Plot - Toggles the radar plot in the map view
-
Show Absolute Grid - Toggles the absolute grid in the map view
-
Show Relative Grid - Toggles the relative grid in the map view (only available in Relative Position Mode)
-
Show Geodetic Grid - Toggles the geodetic grid (longitude and latitude) in the map view
-
Use High-Contrast Grid - Toggles the high-contrast grid in the map view (increases the grid contrast for better visibility)
-
Water Surface Location - Specifies the water surface level. This can be set to 0 m WGS84 height, custom WGS84 height or determined by a depth sensor input.
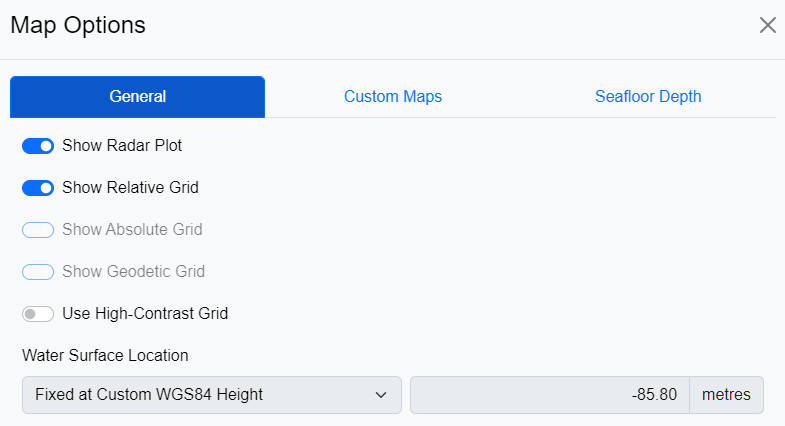
Map Options - General
-
-
In the Custom Maps tab, click Add New Map Layer.
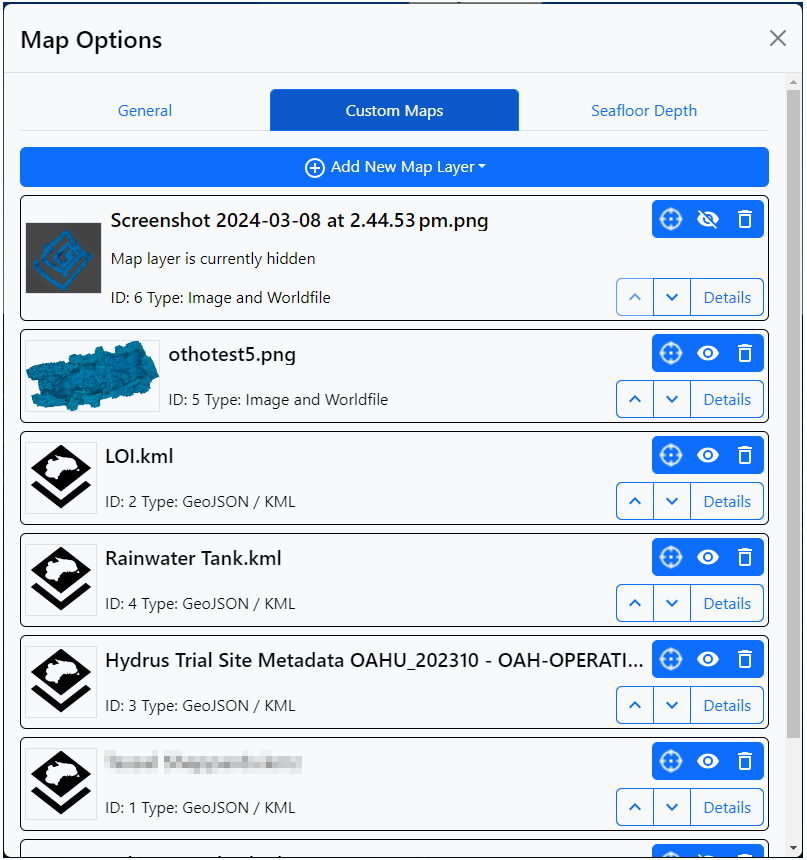
Map Options - Custom Maps
-
Add a GeoJSON layer:
-
Click Choose file and browse to the GeoJSON file to be uploaded.
-
Configure your import preferences:
- Import Points
- Import Lines
- Import Polygons
-
Click Upload.
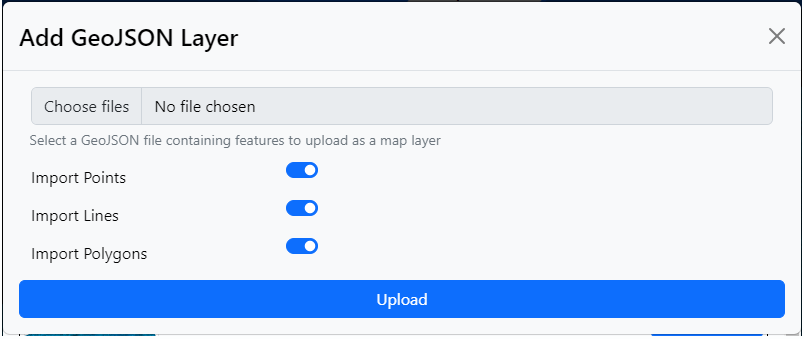
Map Options - Custom Maps - Add GeoJSON Layer
-
-
Add a KML/KMZ layer:
-
Click Choose file and browse to the KML/KMZ file to be uploaded.
-
Configure your import preferences:
- Import Points
- Import Lines
- Import Polygons
-
Select a Height mode from the dropdown list (EGM96 or WGS84).
Note: The altitude model that coordinate heights will be positioned relative to. The KML specification requires EGM96, but some KML files may be defined with heights relative to the WGS84 ellipsoid instead.

Map Options - Custom Maps -Add KML/KMZ Layer
-
-
Add Image and Worldfile layer:
-
Click Choose file and browse to the ESRI-compatible world file (.wld, .pgw, .pngw, .jgw, .jpgw, .bgw, .bmpw)
-
Click Open and then click Upload
-
Click Choose file and browse to the image file associated with the world file (.jpg, .png, .bmp)
-
Click Open and then click Upload
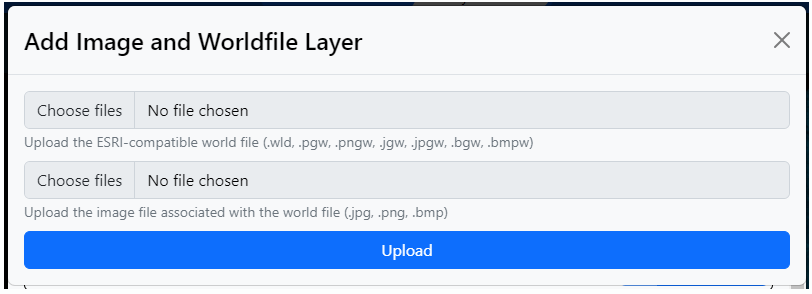
Map Options - Custom Maps - Add Image and Worldfile Layer
-
-
Using the mapping layer controls:
-
Cross-hair icon button - Moves the camera in the map pane to the centre of the layer
-
Eye icon button - Shows and hides the layer in the map pane
-
Bin icon button- Deletes the layer from the mission / session
-
Up / down arrows - Change the order of the layer in the mapping layer stack
-
Details button - Opens the Details dialog for the layer
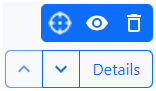
Map Options - Custom Maps - Layer Buttons
The Details view for GeoJSON / KML type layers offers preview of metadata and allows for file downloads.
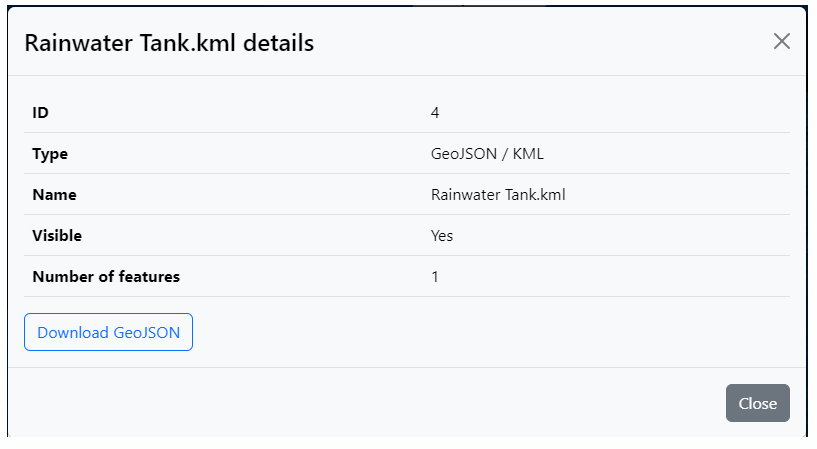
Map Options - Custom Maps - Layer Details GeoJSON / KML
For Image and Worldfiles type layers, the detail dialog offers users to edit the worldfile contents in a text field.
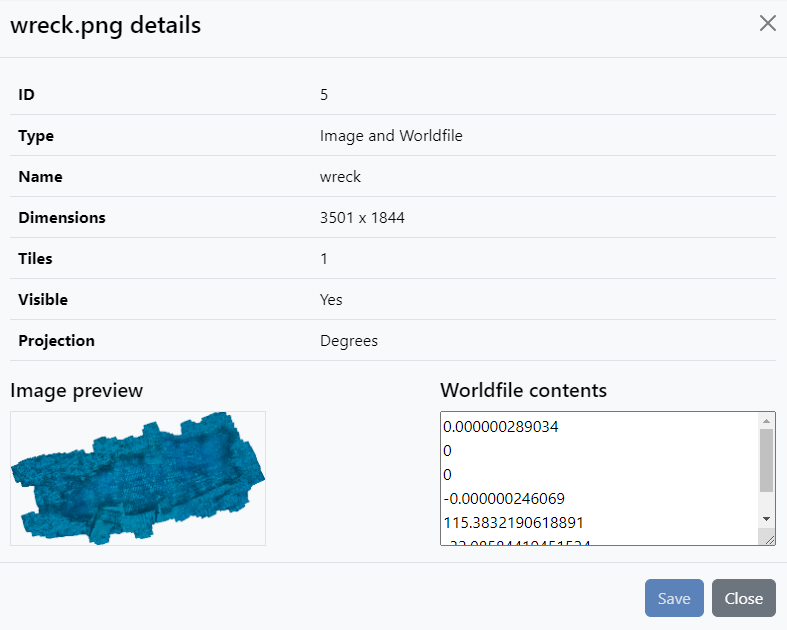
Map Options - Custom Maps - Layer Details Image and Worldfile
-
-
In the Seafloor Depth tab, configure your preferences for the Seafloor layer:
-
Depth Mode
Fixed depth below the water's surface
- Objects positioned relative to the water's surface may appear below the seafloor
- Objects positioned relative to the seafloor may appear above the water's surfaceRelative depth below the water's surface or deepest object
- Objects positioned relative to the seafloor may appear above the water's surface
- Objects positioned relative to the seafloor may infinitely lower the seafloorSticky depth below the deepest object
- Objects positioned relative to the seafloor may appear above the water's surface
- The seafloor will never be raised, only lowered -
Depth Below Surface (metres)
-
Depth Below Deepest Device (metres)
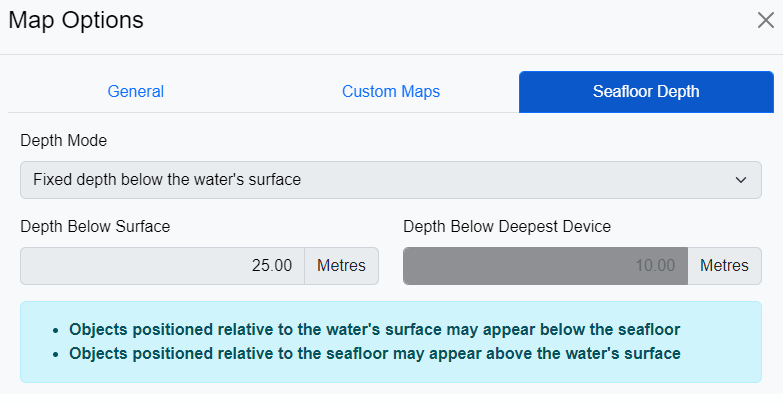
Map Options - Seafloor Depth
-