Connecting Hydrus
Connecting Hydrus Via Access Point
-
Turn Hydrus ON: Start by turning on Hydrus device. To do this, The user will need to switch Hydrus into 'High Power Mode'. If the user is unsure how to do this, see Power States.
-
Wait for Wi-Fi Status: After turning Hydrus on, wait for 1-2 minutes. Pay attention to Hydrus's EPD screen. The Wi-Fi status should change to 'No Connection: See UI'. This indicates that Hydrus is ready to connect.
-
Connect to Hydrus' Network: On the users Wi-Fi-enabled device, open the Wi-Fi settings and look for available networks. Hydrus should appear in the list of available Wi-Fi networks. It will be listed as a serial number, for example: 'Hydrus-002F00075652501620383055'. Select it and connect using the password 'anhydrus'.
When connecting to the Hydrus Access Point (AP), Windows may display a warning because the Hydrus AP does not provide an internet connection. This is expected behavior and does not indicate a problem with the connection.
-
If the device asks whether the user wants to stay connected to the Hydrus AP despite the lack of internet connection, the user should click "Accept" or the equivalent option on the device.
-
The user should ensure that the device has not automatically connected to another network without the user's knowledge. Some devices may switch to a known network with internet access.
-
If the device is connecting to another network, the user may need to "forget" that network in the device's settings. This action will force the device to connect to the Hydrus AP, even though there is no internet connection.
-
-
Access Hydrus' Interface: Once connected, open an internet browser. In the address bar, type in '192.168.0.1'. The user will see a screen the that represents Hydrus's user interface. From here, the user can manage Hydrus.
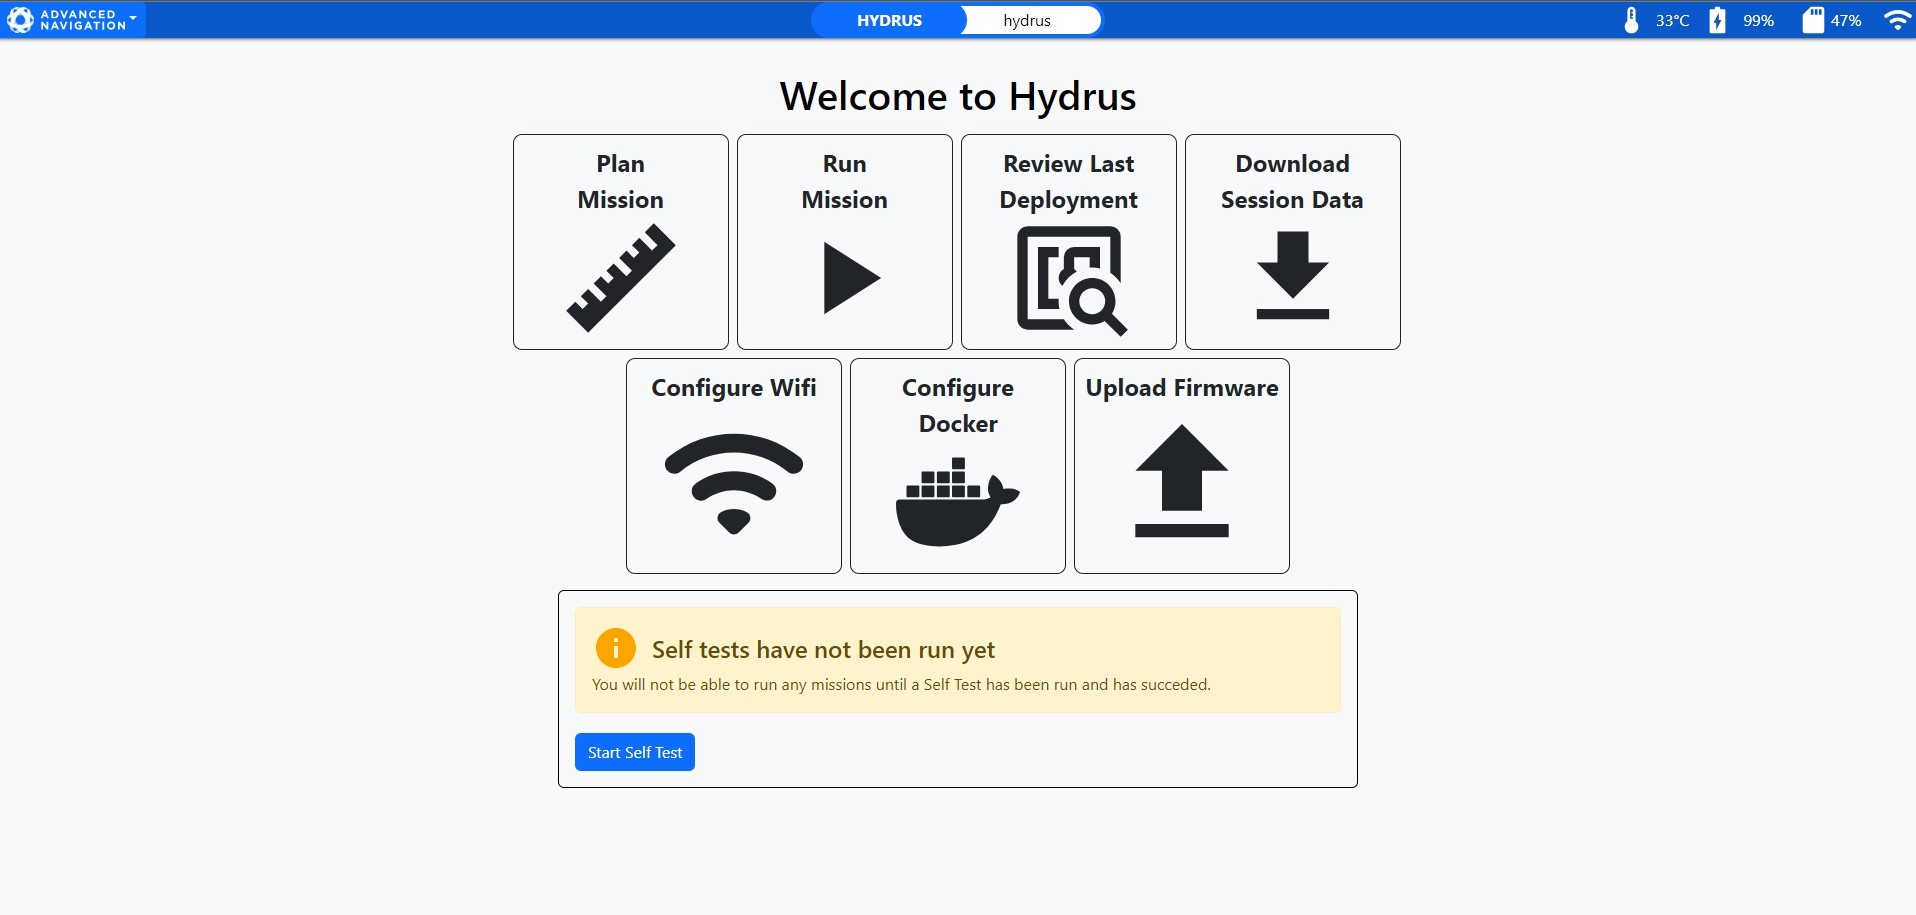
Hydrus Web UI Main Page
Note: Remember to follow each step carefully and ensure your device is connected to Hydrus's network before trying to access the user interface. If you encounter any issues, refer to the troubleshooting section of your Hydrus manual or contact Hydrus support.
Connecting via Network
-
Connect to Hydrus: Start by connecting Hydrus device as described above in Connecting Hydrus via Access Point.
-
Access the Main Page: Once connected to the Main Page, click on Configure Wi-Fi.
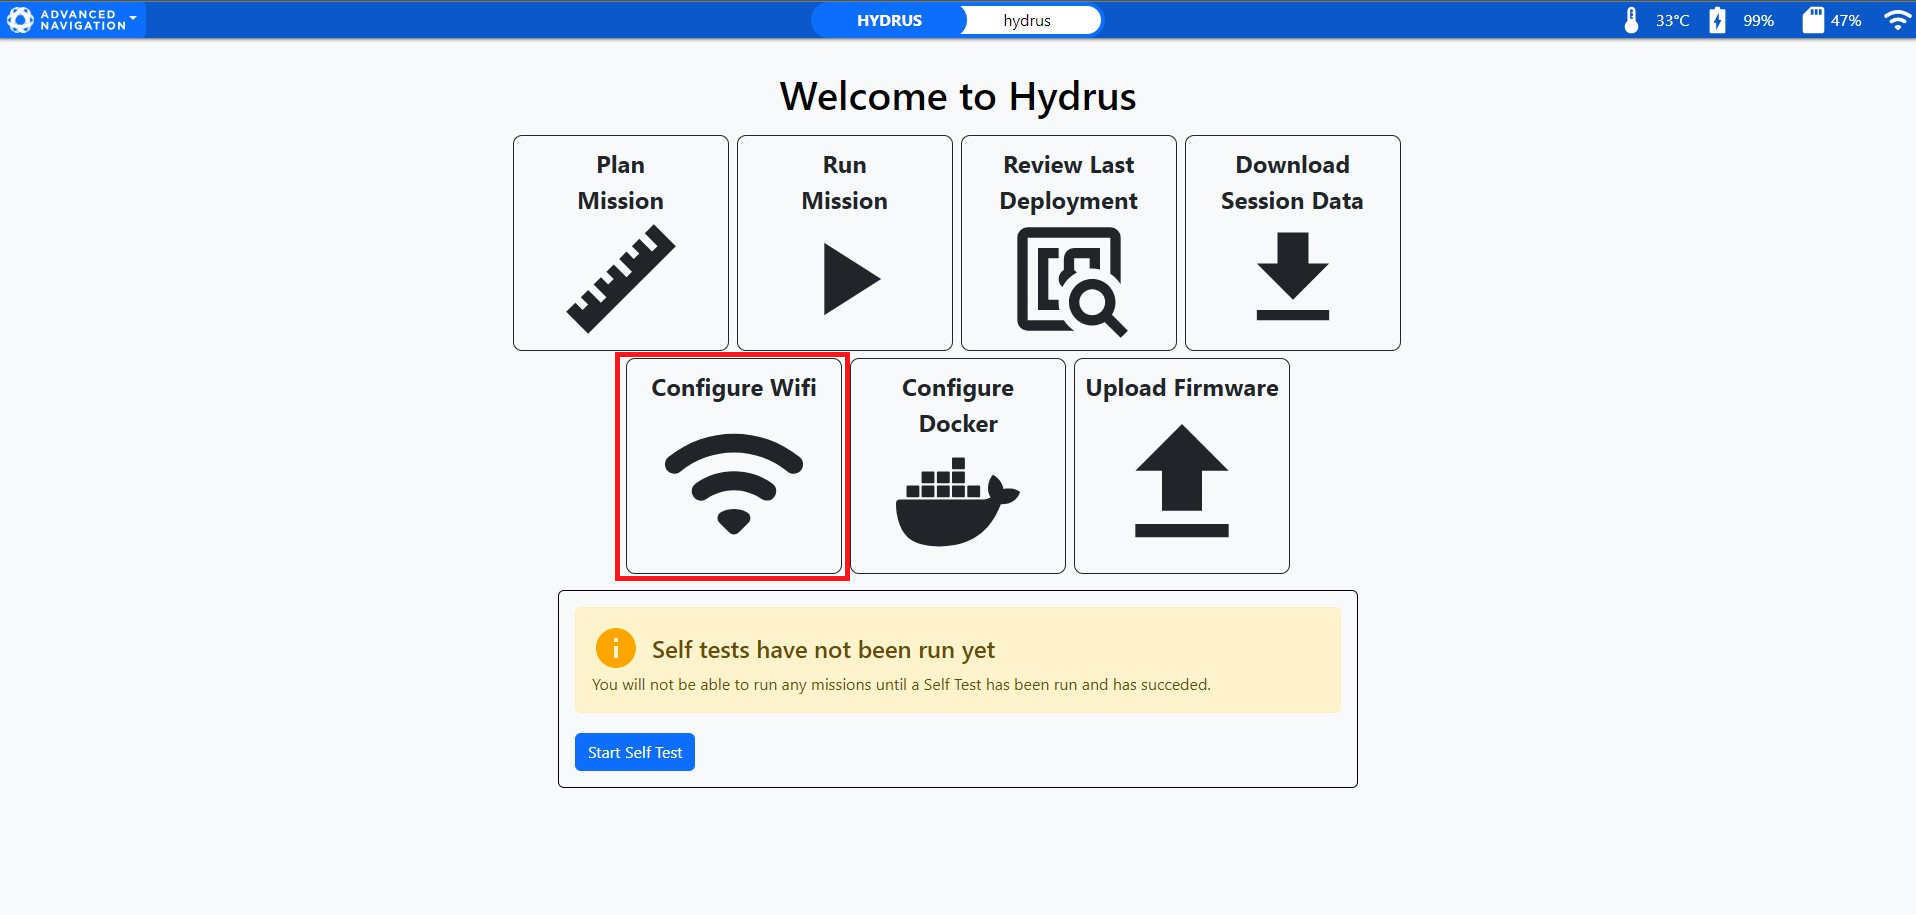
Wi-Fi Icon
-
Add Network: Under known Wi-Fi Networks select Add Network.
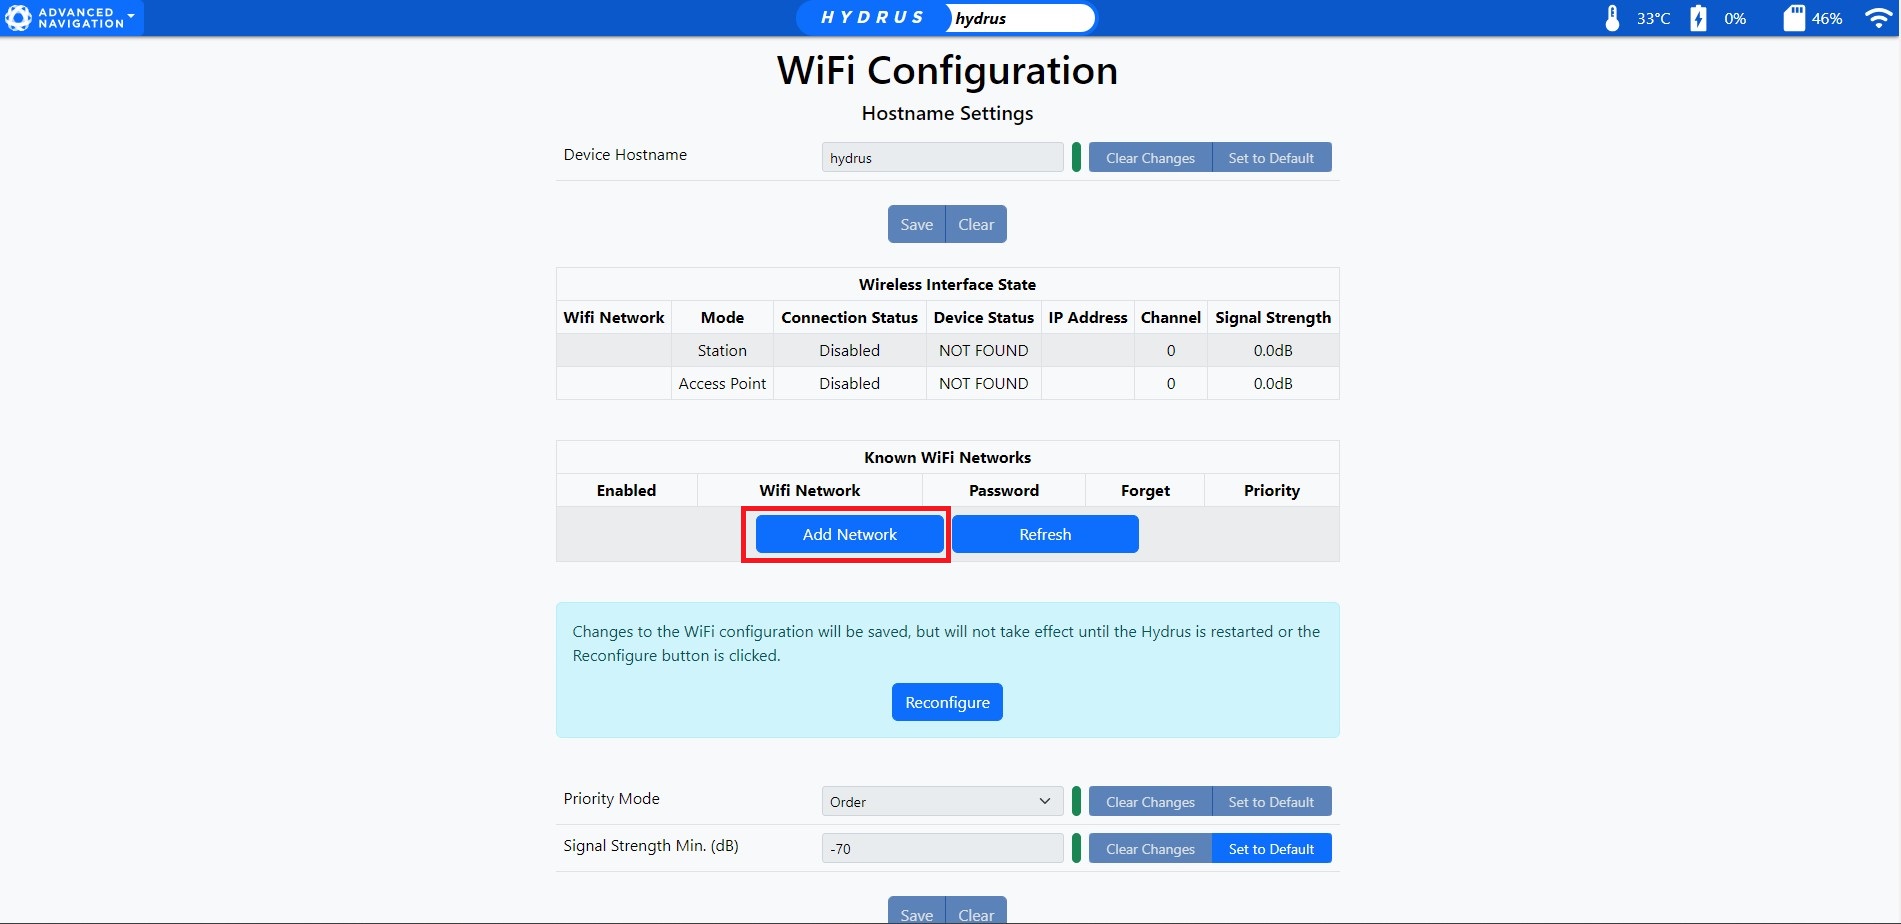
Add Network
-
Run Scan: Click Run Scan for Hydrus to initiate its run scan function to search for the network the user requires.
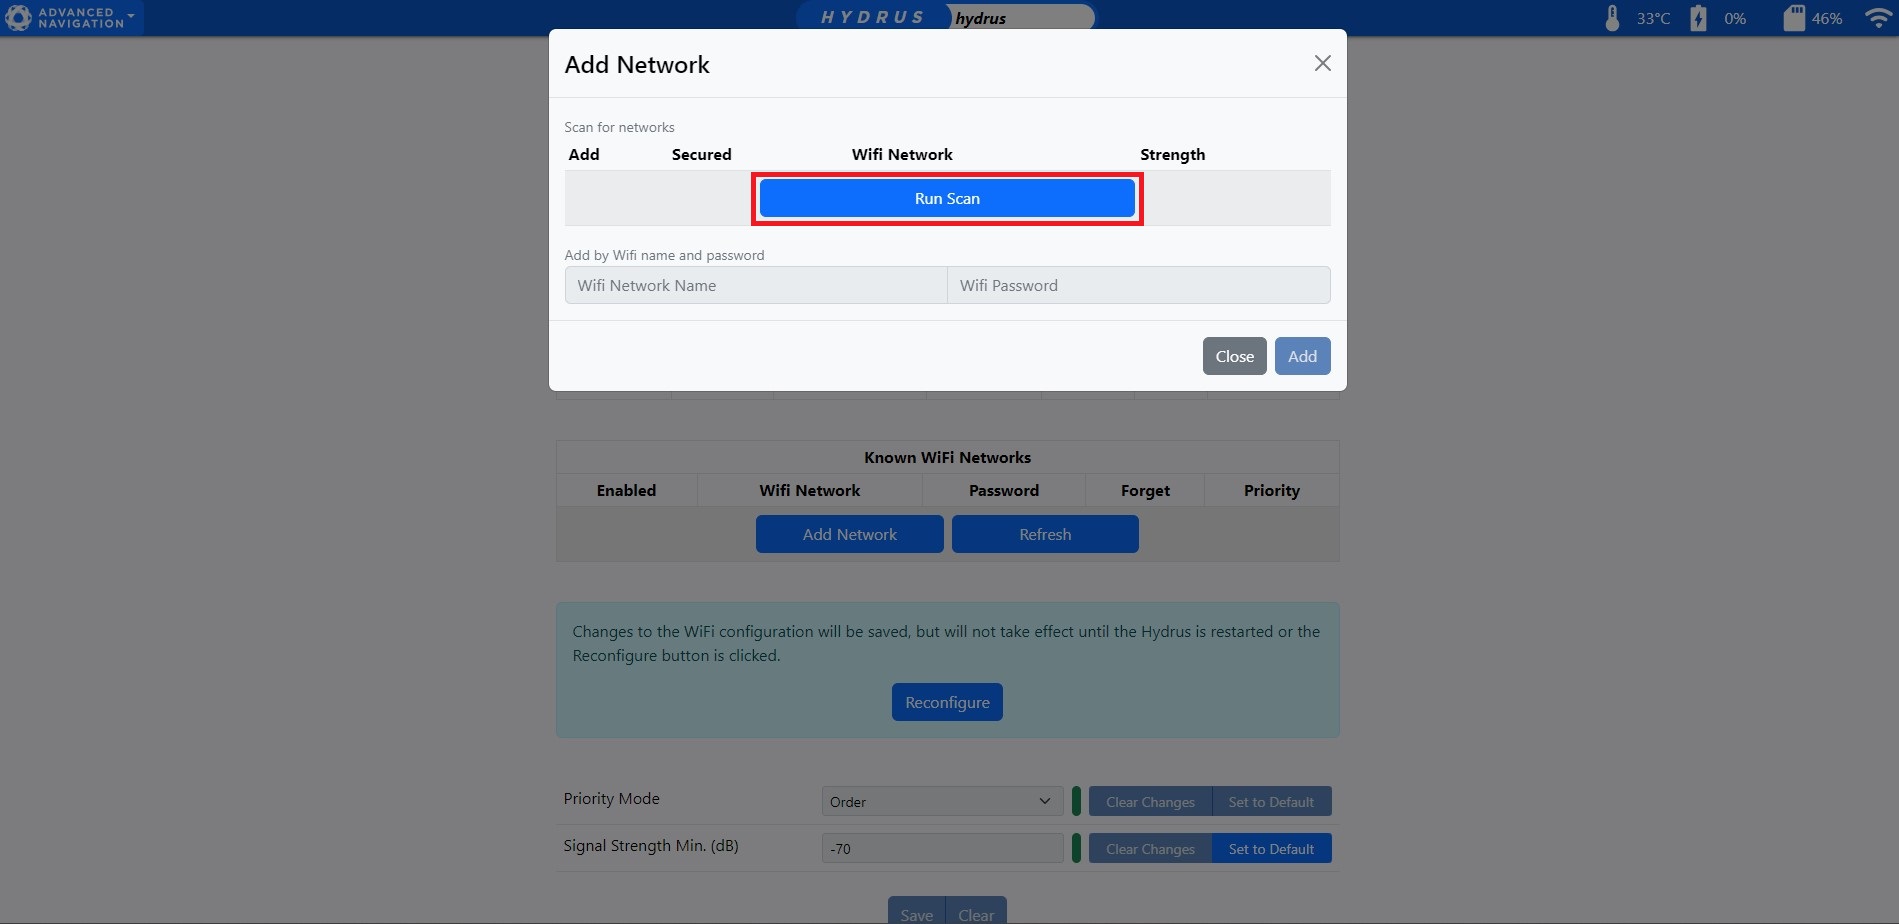
Wi-Fi Configuration Run Scan
-
Select Network : After Hydrus completes the network scan, the user will choose their preferred network. Upon selection, a new dialog box will emerge, prompting the user to enter the network's Wi-Fi Password.
Note: Alternately the user can manually input the Wi-Fi network and the Wi-Fi Password.
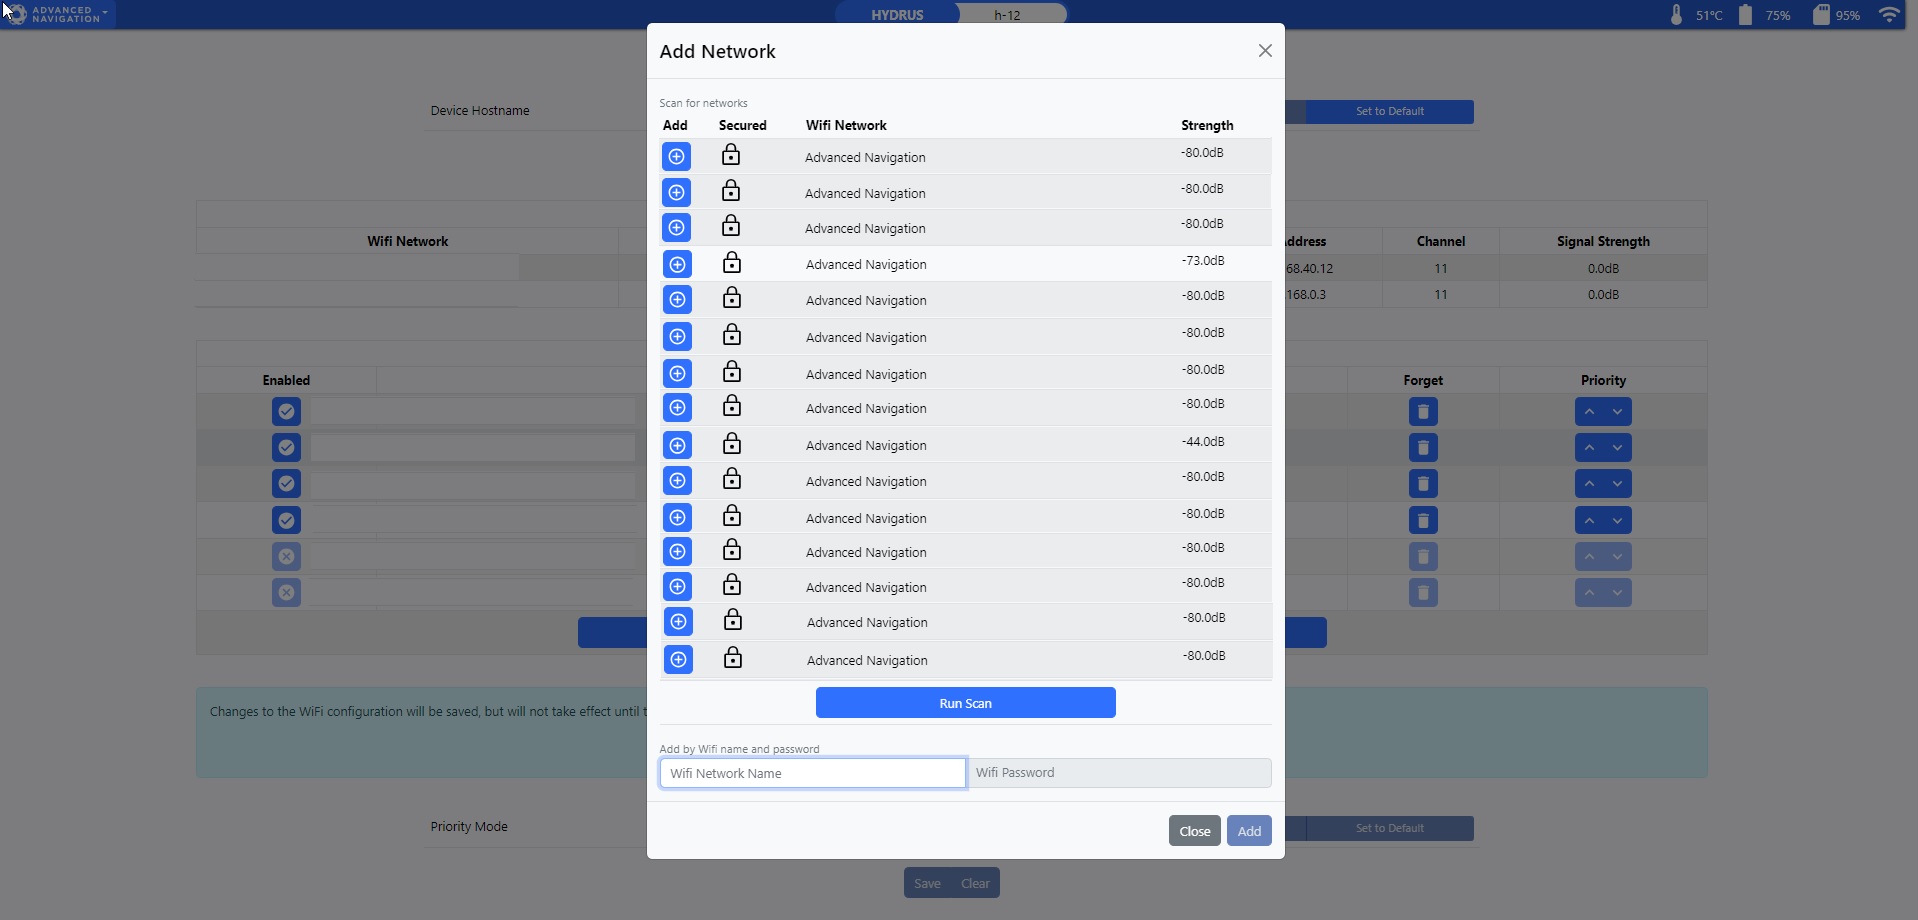
Wi-Fi Configuration Network
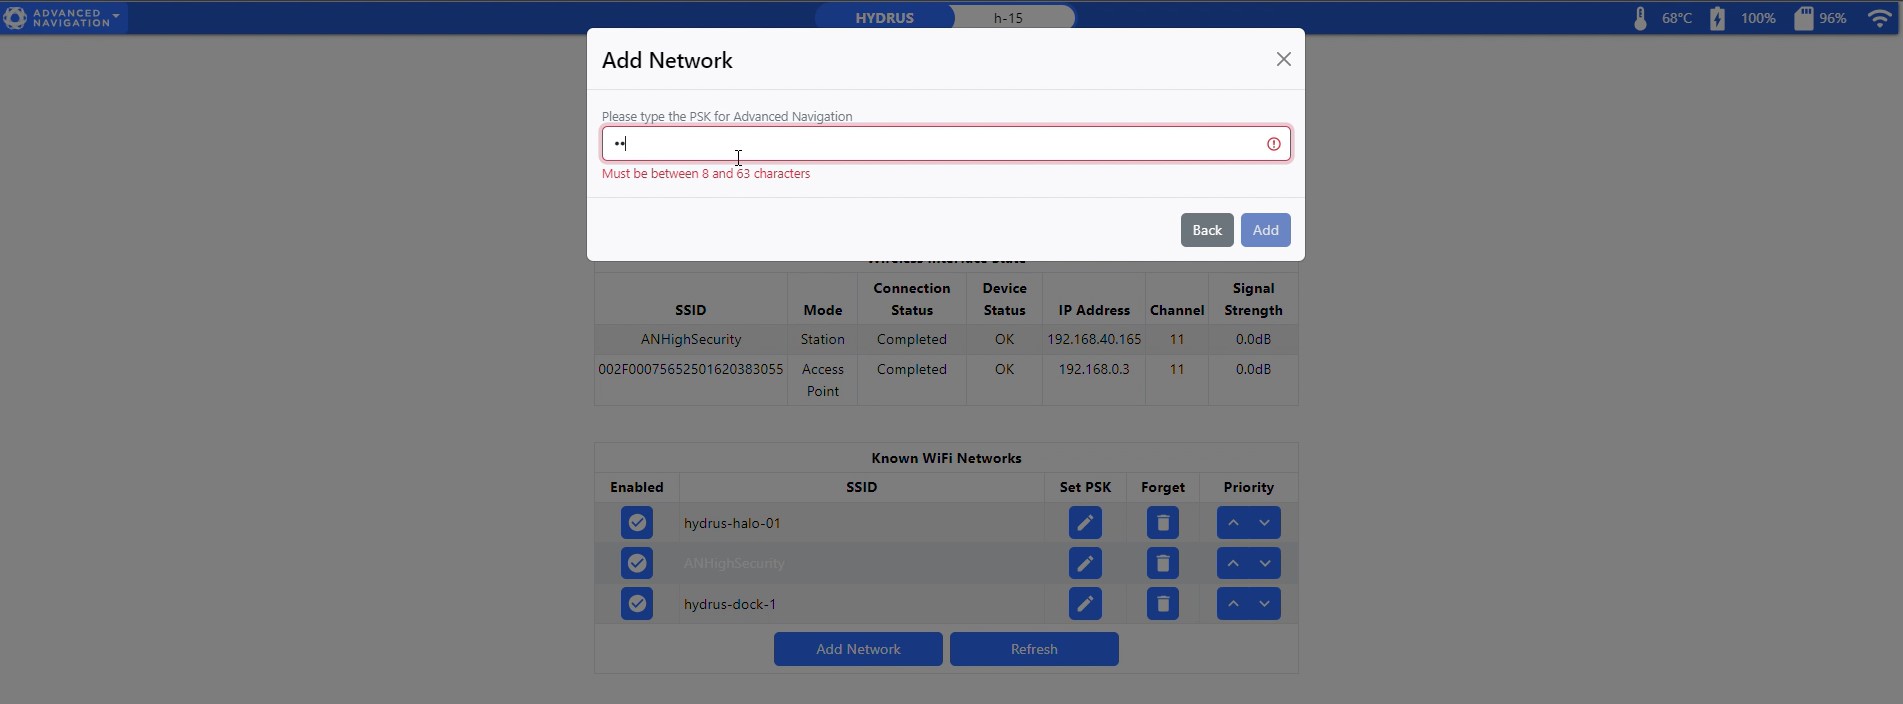
Wi-Fi Configuration Password
-
Set Priority : The user has the option to select the priority of the networks Hydrus can connect to.
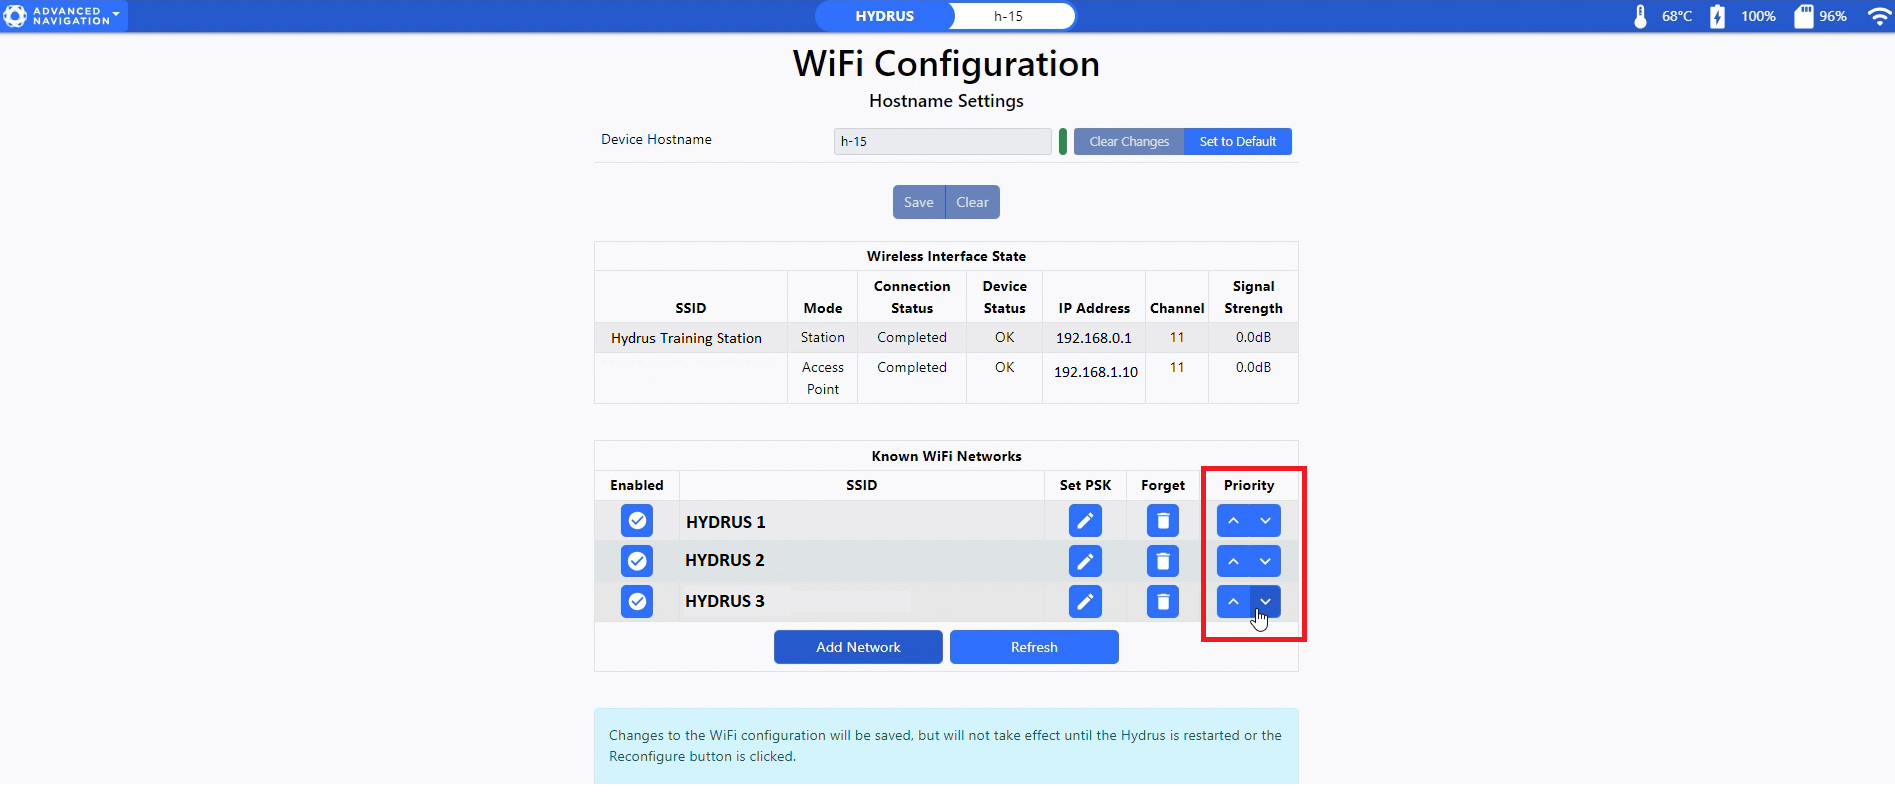
Wi-Fi Configuration Priority
-
Reconfigure : Modifications to the WiFi settings will be stored, but they won't be implemented until either the Hydrus system is rebooted or the 'Reconfigure' button is selected.
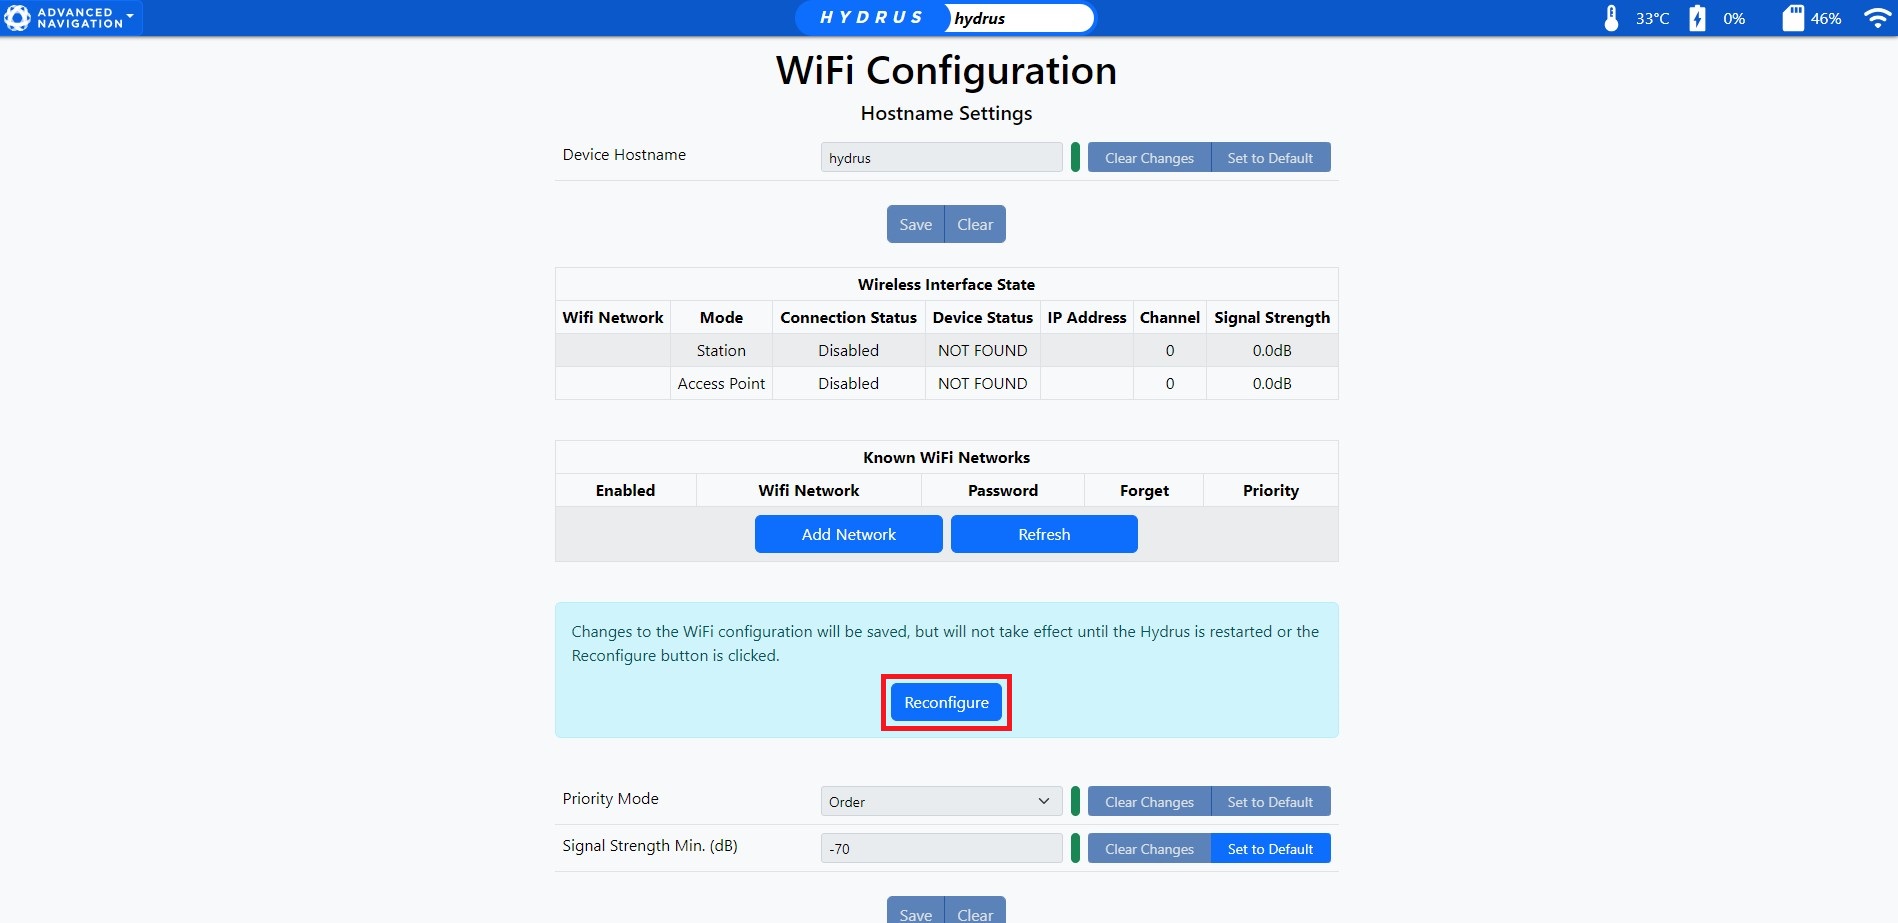
Wi-Fi Configuration Reconfigure