Initial Set-Up
Below is a step-by-step overview of the initial set-up process for Hydrus.
Software and Hardware Prerequisites
Some basic hardware and software are required for interfacing and operating Hydrus. The following prerequisites before interfacing or configuring:
-
A laptop, tablet or computer with Wi-Fi connectivity
-
Ensure Firefox or Chrome is installed (recommended web browsers for the Hydrus and Subsonus web UI)
-
If using Windows, install zeroconf (Apple Bonjour) from one of the links below:
-
https://www.advancednavigation.com/Bonjour.msi (32-bit installer)
-
https://www.advancednavigation.com/Bonjour64.msi (64-bit installer)
-
-
If using Subsonus, connectivity to a local network with Ethernet AND Wi-Fi, such as a Wi-Fi router. DHCP is required, a basic switch on its own is not suitable.
Safety Precautions for handling Hydrus out-of-water
Always Maintain Two Points of Contact
-
When handling Hydrus, make sure you have two points of contact to maintain stability. These points of contact should be the transponder and the vision end of Hydrus. This will help prevent accidental drops or mishandling.
Avoid Holding Hydrus from Thruster Guards
-
It is important to avoid holding Hydrus from the thruster guards. The thruster guards are designed to protect the thrusters and should not be used as a handle. Holding Hydrus from the thruster guards can cause damage to the device and compromise its functionality.
Caution with LED Lights
-
When the LED lights on Hydrus are in operation, avoid making direct contact with your eyes. The LED lights can be bright and may cause discomfort or temporary vision impairment. Ensure you are aware of the LED light status and take appropriate precautions to protect your eyes.
Placing on a Hard Surface
-
When placing Hydrus on a hard surface, follow these steps:
-
Ensure the non-thruster side of Hydrus is facing down as seen below. This will prevent accidental slippage or unbalanced placement.
-
Place Hydrus with the EPD screen facing up to protect the display and allow for easy visibility.
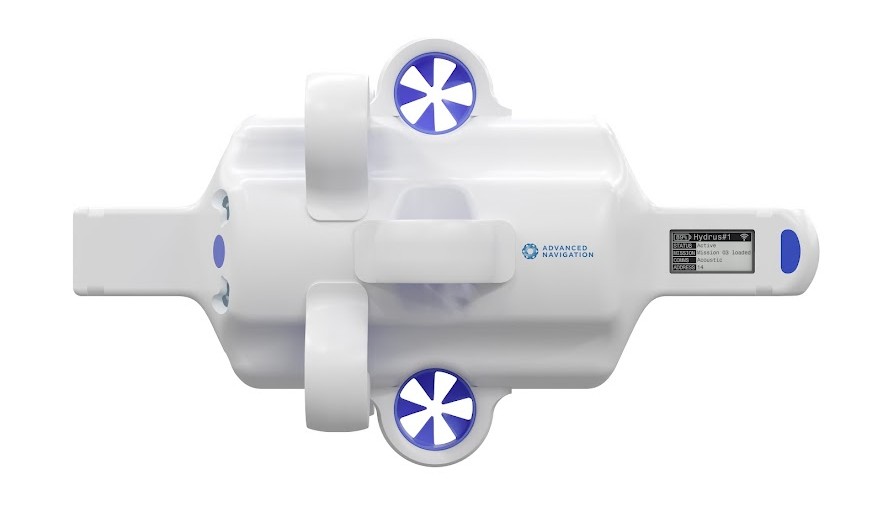
Hydrus Placement Top Down View
-
Unpacking and Inspection
Check for damage
-
Carefully inspect the exterior of Hydrus for any visible signs of damage, such as dents, scratches, or cracks.
-
If any damage is detected, document it immediately and contact Advanced Navigation support for further guidance
Verify quantity and equipment
-
Cross-reference the items listed on the Part Numbers and Ordering with the physical contents of the package.
-
Ensure that all the expected components and equipment are present and accounted for.
Documentation
-
Retain all packaging materials, invoices, and documents related to the delivery for future reference or potential warranty claims.
Power and Charging
Plug in the Desk Charger
-
Connect the charger to a suitable power source, ensuring it is compatible with the voltage requirements of the charger.
Note: The Desk Charger is designed to only operate in a dry environment.
Insert Hydrus into Desk Charger
-
Align the Hydrus EPD screen with the Advanced Navigation label located on the front of the charger, ensure the EPD screen is facing the user and carefully insert it into the charging dock as shown.
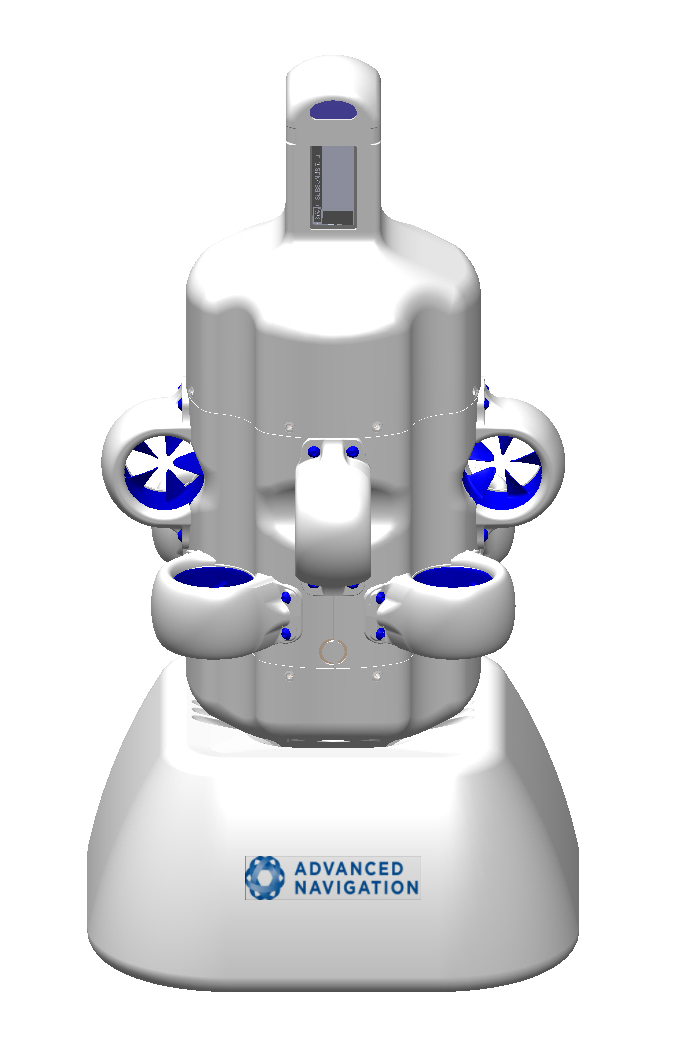
Initial Charge
-
Hydrus is delivered in a power state called shipping mode, this power state is used for the transport and extended shelf storage. In order to continue with the initial set-up, Hydrus must be taken out of shipping mode and charged. The steps for this is as follows:
-
Place Hydrus into the Desk Charger, this will automatically take Hydrus out of shipping mode and will put the device into Low Power, this will be displayed on the EPD screen. Below is what should be seen on the EPD screen of Hydrus.
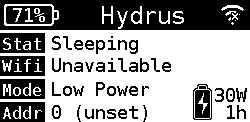
EPD Sleeping Status
-
Leave Hydrus connected to the charger until it reaches a full charge of 100%.
Note: Ensure Hydrus is dry before inserting it into the Desk Charger.
Putting Hydrus from Low Power to High Power
Hydrus is now in Low Power and will need to be put into High Power to continue the initial set-up. The steps for this is as follows:
-
Verify that Hydrus is currently in Low Power.
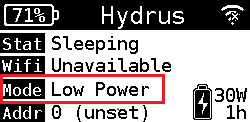
EPD Sleeping Status Verified
-
On the EPD screen, tap the magnet once. If the state prompt (image below), does not appear, it could indicate a false contact. In such cases, continue tapping the screen until the state prompt becomes visible.
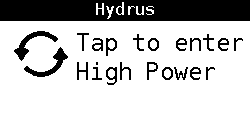
High Power State Prompt
-
Tap the screen again, in response to the prompt mentioned above. Hydrus will move into a Booting Status this is confimed by the EPD screen below:
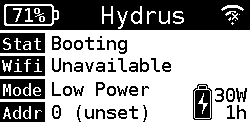
Booting Status
-
Verify the mode to confirm that High Power has been successfully selected.
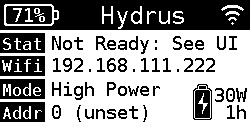
High Power Not Ready
-
Hydrus is now in High Power and able to be accessible via Wi-Fi.
For more information on Power States see Power States
Device Connection
Connect to Hydrus access point
-
Ensure Hydrus is in High Power.
-
Connect your device (laptop, phone, ...) to the Hydrus Wi-Fi:
-
Network: Something like:
space 001F000D5556501920303555 -
Password:
anhydrus
-
Hydrus web UI via a browser
-
Launch a web browser on your device and navigate to the Hydrus web UI (User Interface) at http://192.168.0.1 for configuration and control.
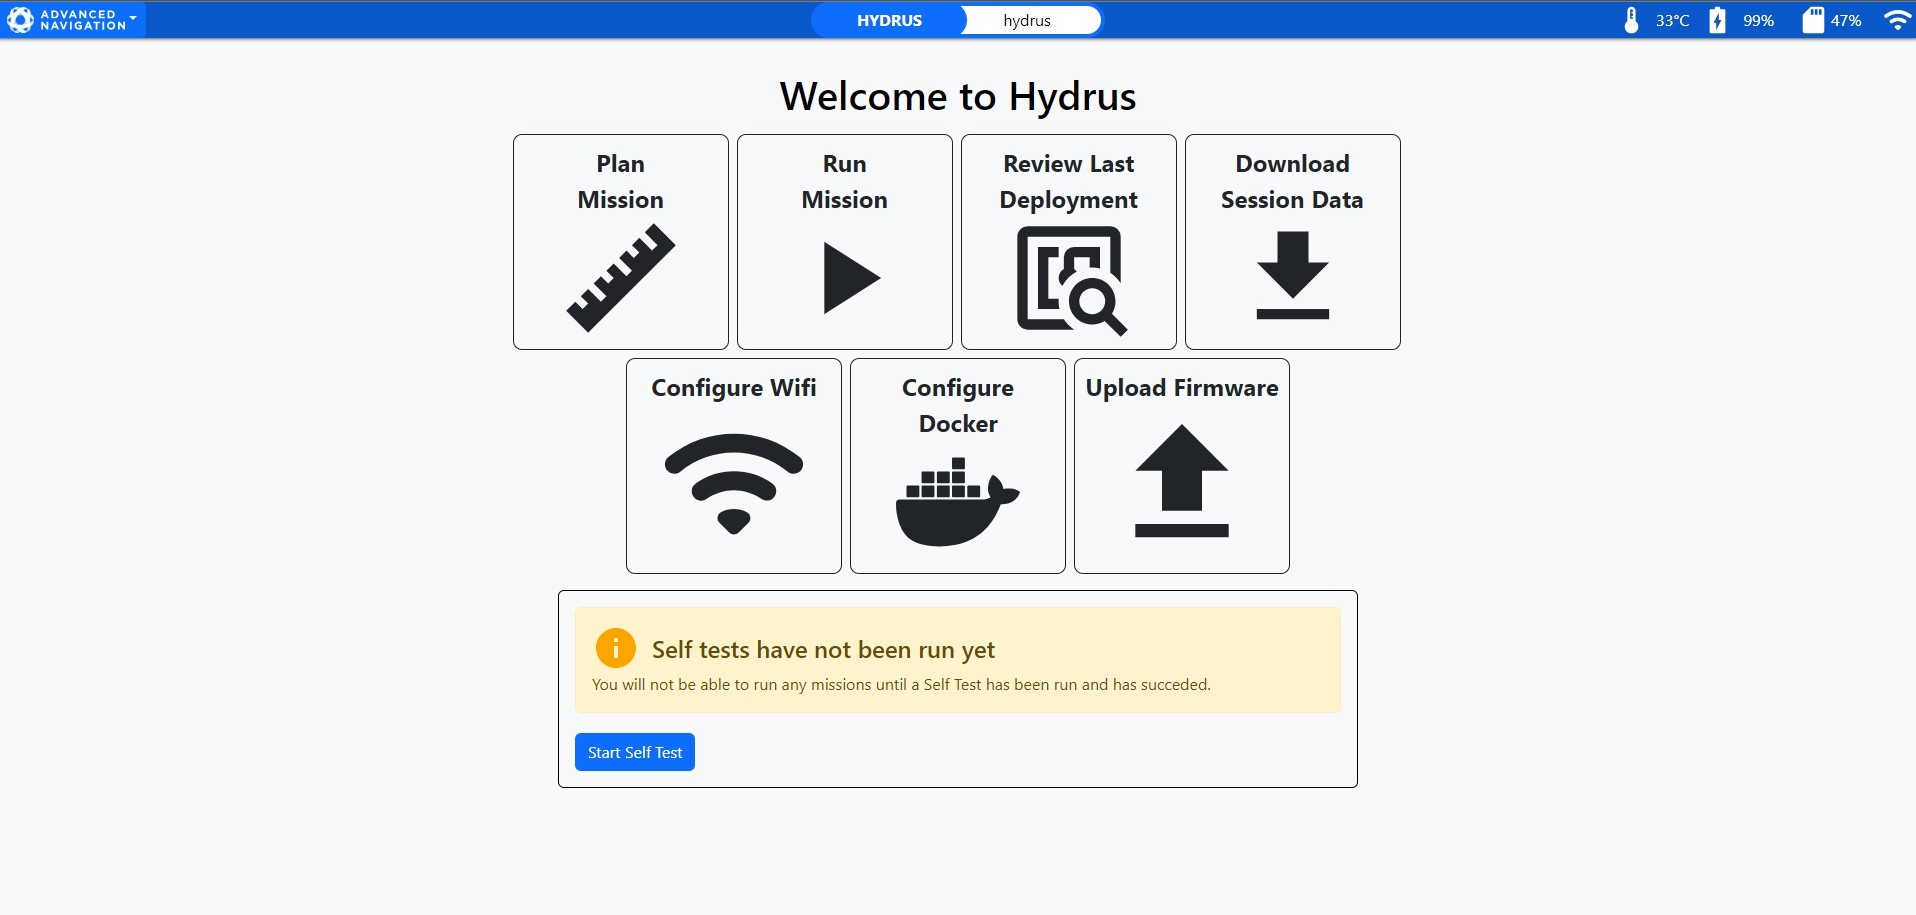
Hydrus Web UI Main Page
Note: For difficulties connecting to the Hydrus access point or network, refer to Connecting Hydrus
Testing and Functional Checks
Conduct a self-test
-
Ensure that Hydrus is powered on and connected to the network or access point as described in the previous steps.
-
Open a web browser on a user device and enter the appropriate IP address or URL to access the Hydrus web UI.
-
Navigate to the self-test section, there is a shortcut for this located at the bottom of the landing page of the web UI.
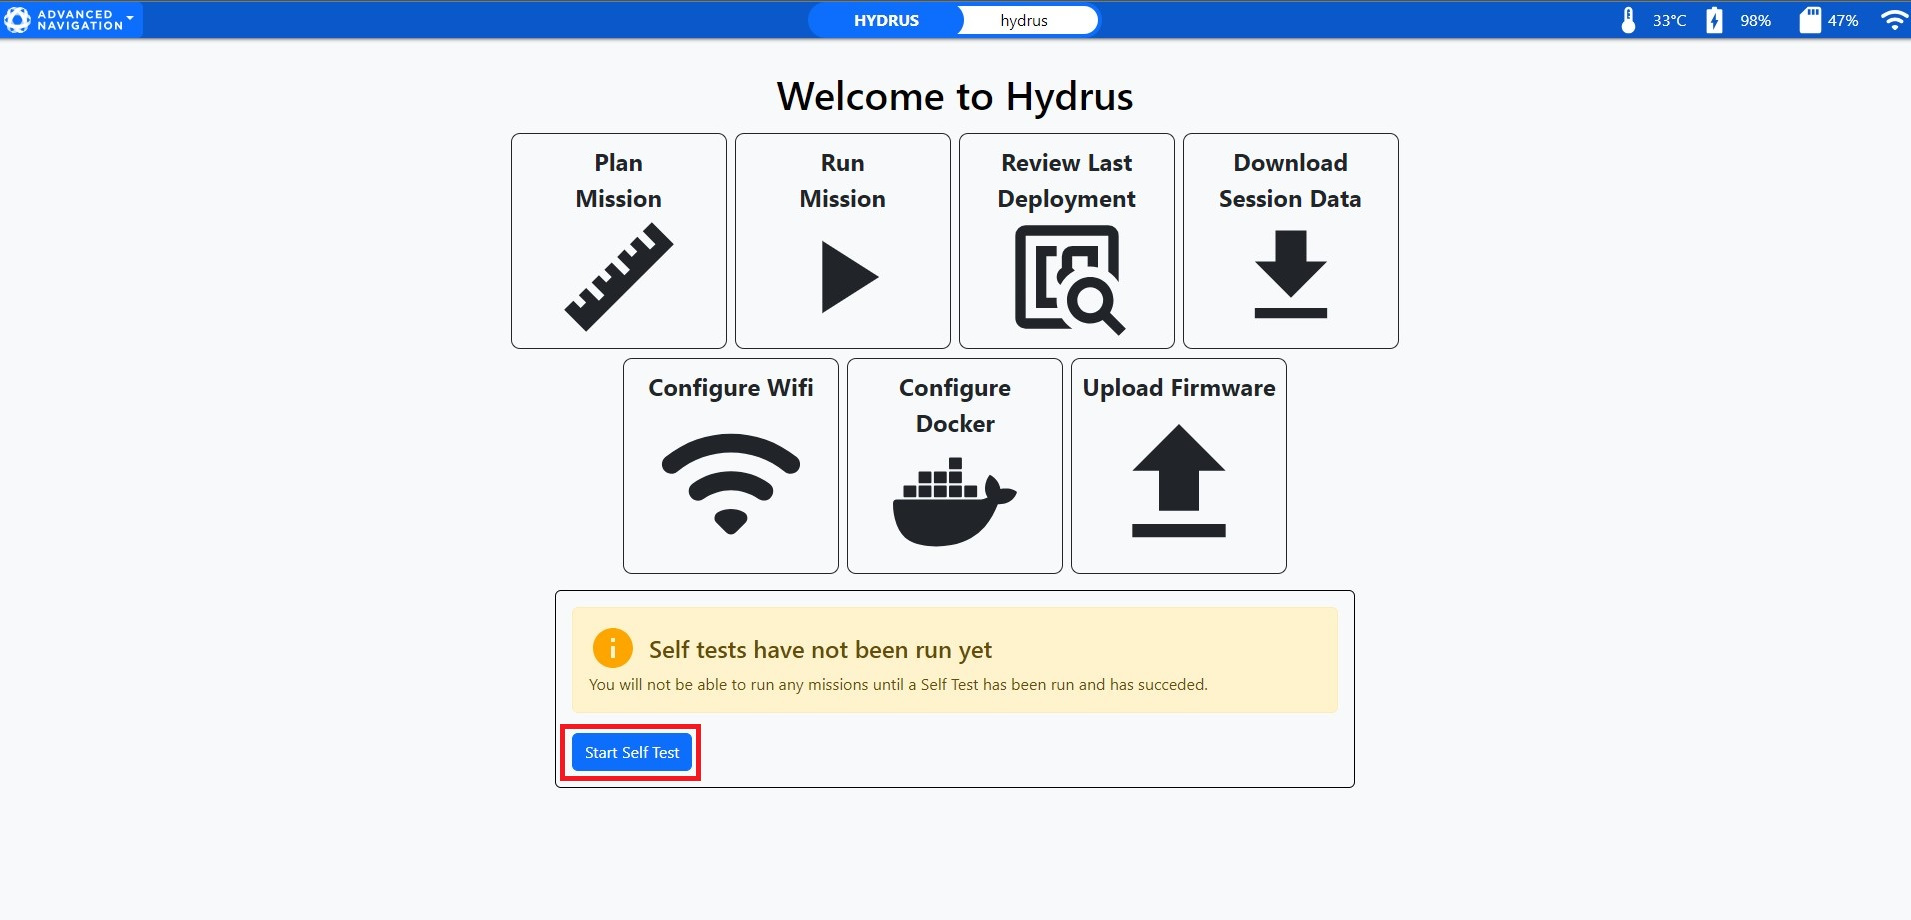
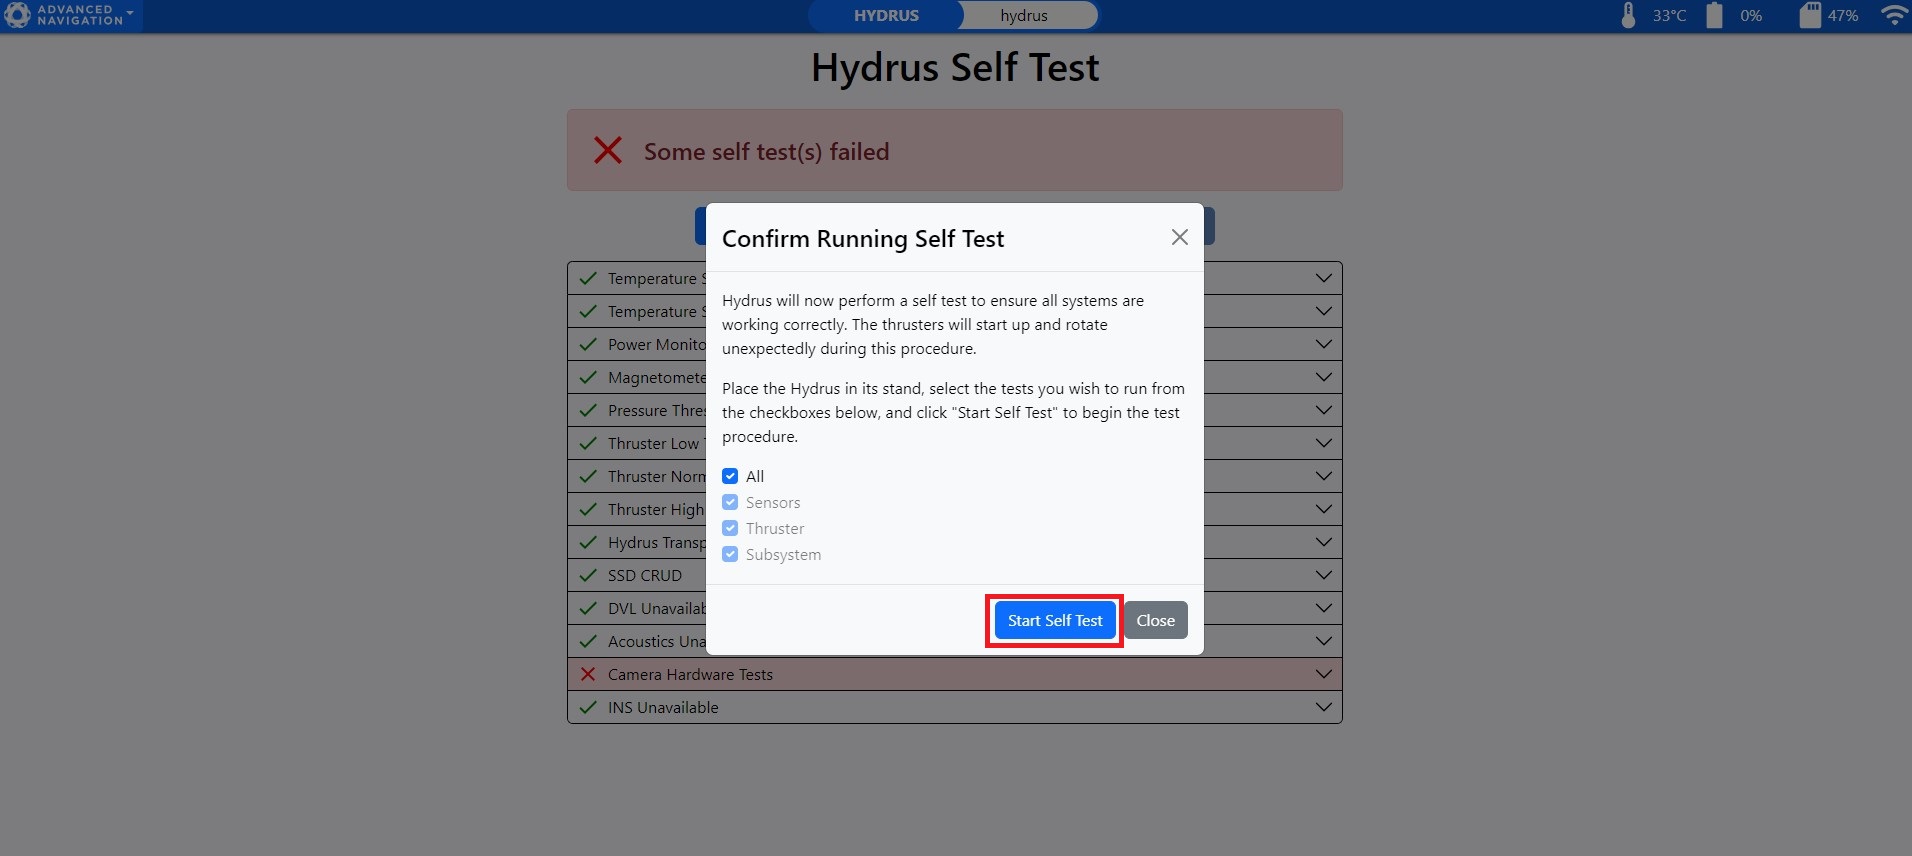
Start Self -Test
-
Initiate the self-test process as guided by the instructions provided in the web UI.
Self -Test Confirmation
-
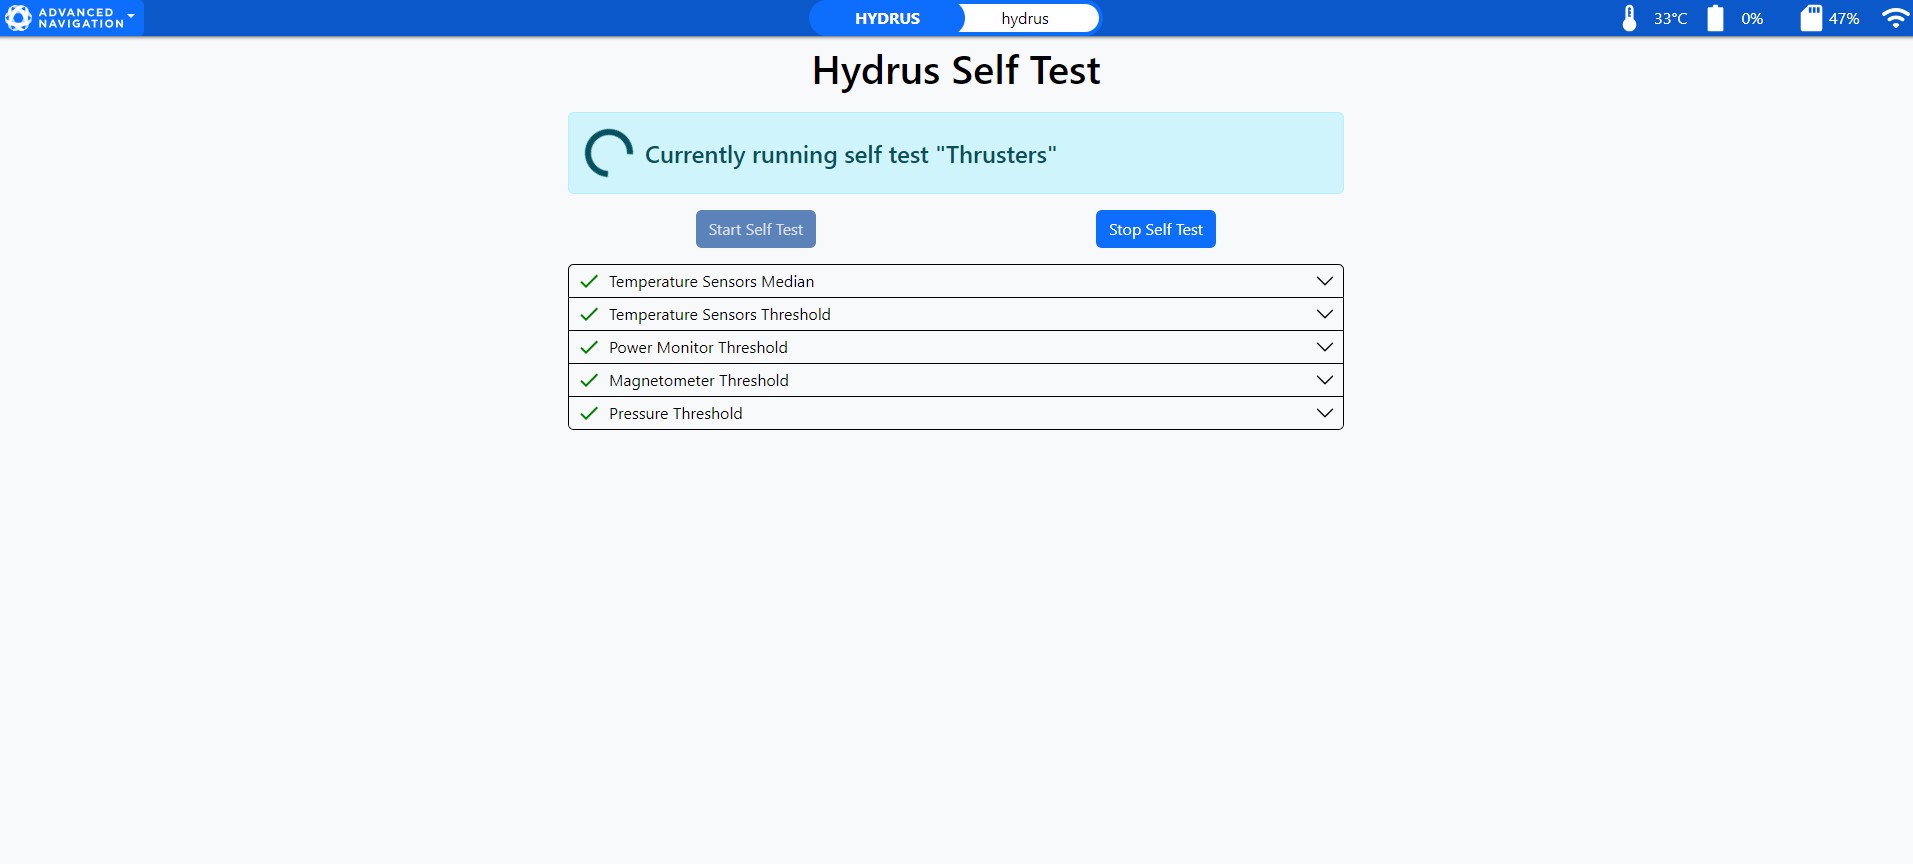
Pay attention to any error messages, warnings, or indications provided by the self-test process.
Self -Test Running
-
The self-test will come up as complete, if the self-test identifies any issues or malfunctions, contact support@advancednavigation.com.
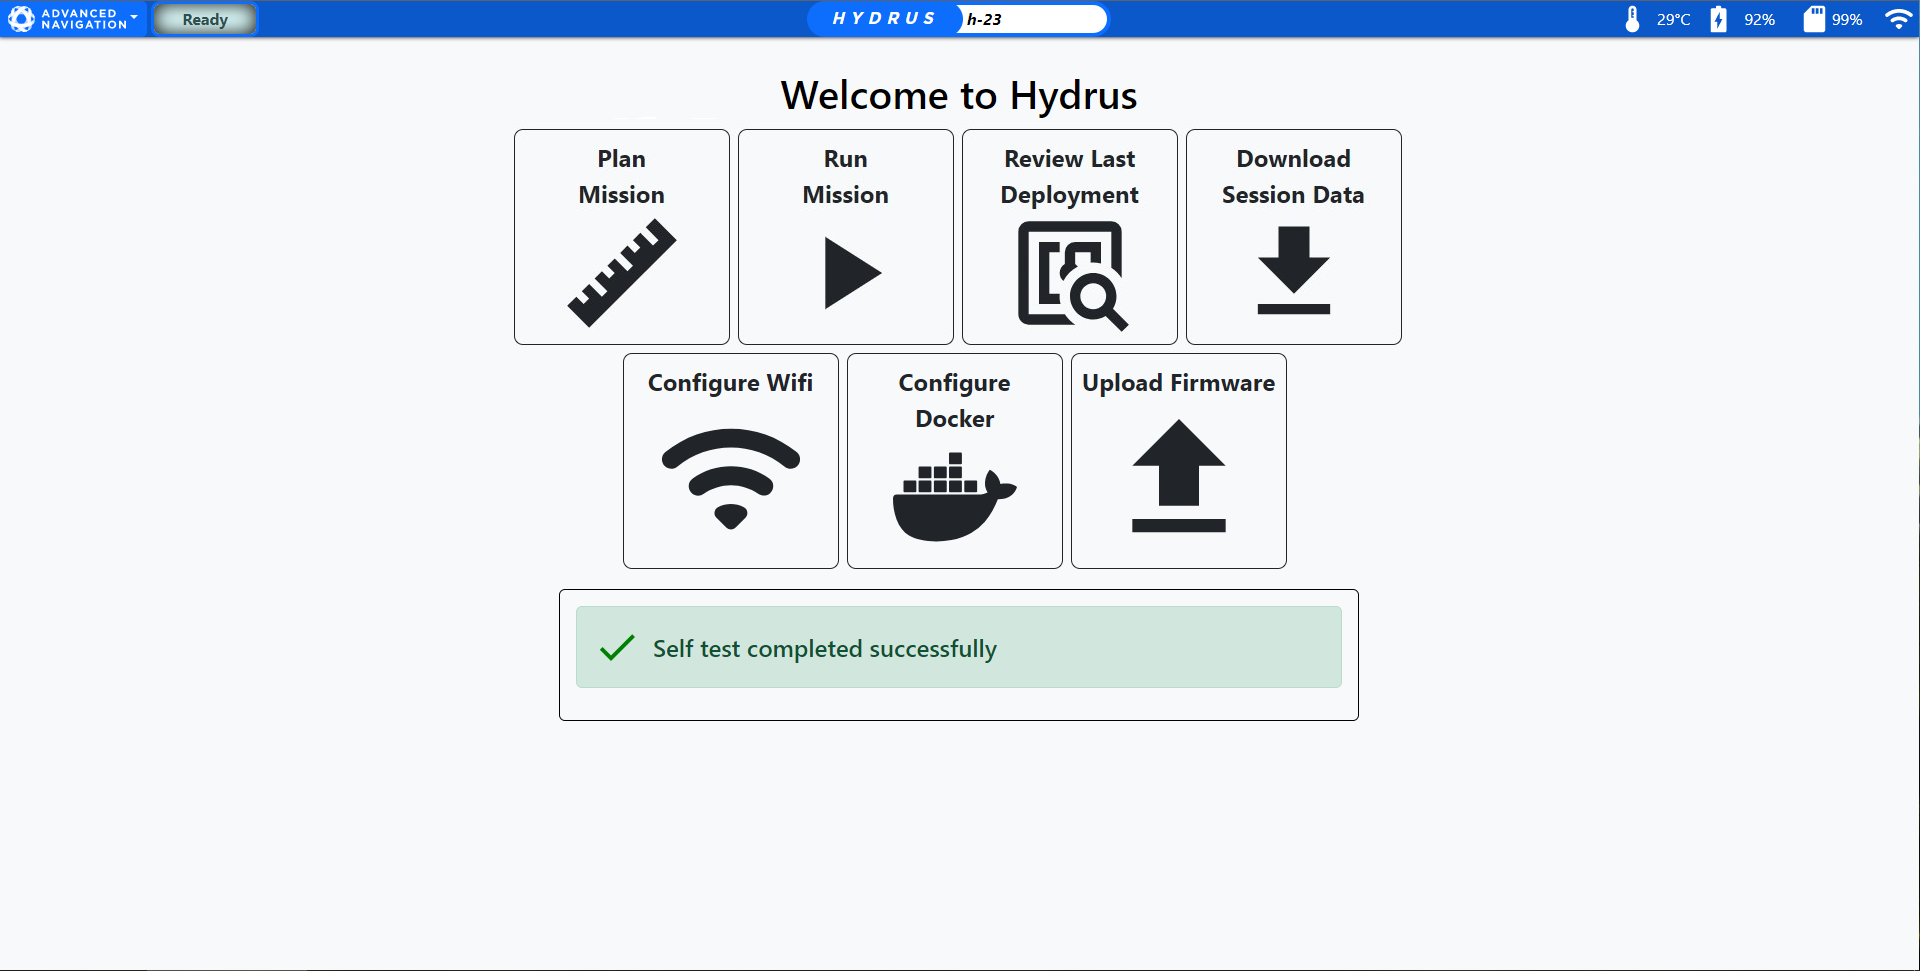
Successful Self -Test
Note: Performing a self-test MUST be completed before running or planning any missions with the Hydrus. Hydrus will not proceed without a self test.
Subsonus
If using Subsonus with Hydrus follow the steps in Installation Checklist for the necessary connection steps.
Note: After completing the initial set-up, proceed to Mission Planning Process
